

How To Create Photoshop Presets
10 tips for better Photoshop textures
While 3D painting applications such as The Foundry's Mari are gradually replacing 2D software for texture painting, Photoshop nevertheless remains a stalwart for many, with its flexibility and advanced blending, painting and masking tools still offering a robust package for texture painters who have either not invested in a 3D painting package yet, or continue to use it alongside a 3D package.
Photoshop still has a few tricks up its sleeve that the 3D options don't yet offer, especially when it comes to blending and adjusting layers in a texture. Additionally, the user-friendliness and familiarity of the application make it a good solution for things that need to be done quickly and with minimal fuss.
This is a collection of essential techniques and tips for texture painters using Photoshop.
These represent some of its greatest strengths with regards to our particular discipline, and will help to improve your efficiency and texturing approach if you incorporate them into your workflow. Many of these are particularly notable for their non-destructive approach.
In other words, they use tools and techniques such as adjustment layers and layer masking, which offer a great way to alter your document in a non-permanent fashion, so you can change or even completely undo your work at a later stage without excessive reworking.
This non-destructive workflow has always been one of Photoshop's greatest flexibilities when it comes to painting textures, and is a core reason why it remains an essential part of most texture painters' toolsets.
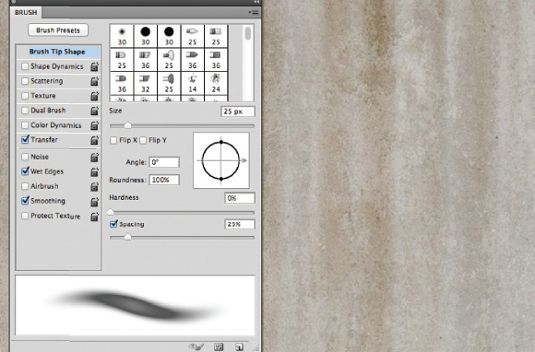
01. Customising your brushes
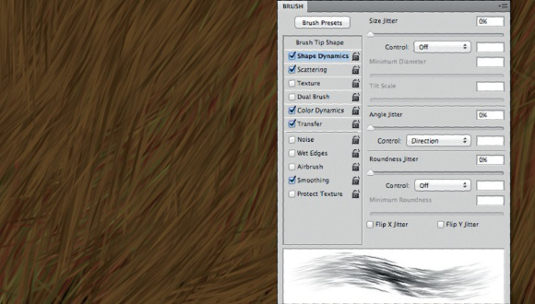
Photoshop's brush engine is an extremely robust and highly customisable one, offering a wide array of custom features that you can tailor to your particular style of painting, or to achieve a specific effect.
Creating brushes from any bitmap shape is as simple as selecting the shape and then selecting Edit > Define Brush Preset, which creates a new brush in your current Brush palette from the selection.
You can then open the Brush Tool palette and add additional enhancements to it. Among the most useful of these are Angle Jitter, which causes the brush's shape to follow the direction you're painting in – which is great for painting things like fur or stitching details on clothing.
02. Good cloning techniques
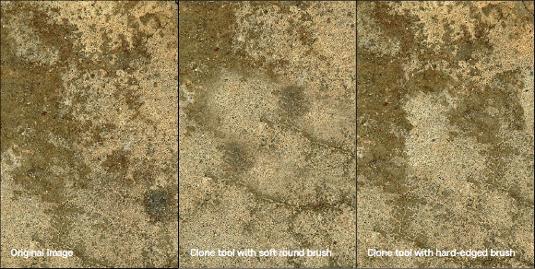
Everyone loves Photoshop's Clone Stamp tool, mostly commonly simply referred to as the Clone tool. However, there's a trick to using it in such a way as to prevent areas from becoming soft and blurred, and that's to use hard-edged, custom-shaped brushes.
Using Photoshop's default round brushes with soft edges, which is what many beginners use (and what you would use in many other circumstances), tends to result in soft patches in the texture, due to the soft edges of the cloned patch of pixels. Using a custom shaped, grungy type brush with hard edges will reduce this soft effect. Use custom-shaped brushes – round brushes don't look good when cloning with hard edges.
03. Use layer blend modes
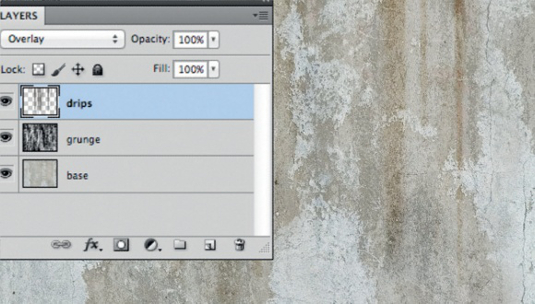
Using Photoshop's layer blend modes generally produces more natural-looking results than simply lowering the opacity slider on a normal blended layer.
Modes such as Overlay, Multiply and Soft Light in particular are very useful for layering different photographic textures or painted layers with pleasing and organic-looking results, with each mode using the tonal values of the layer differently to produce the final result.
While these blending modes can be useful for all kinds of textures, they're particularly efficient at creating organic textures, because blending multiple layers on top of one another produces a sense of substantial depth. This impression of depth is especially good for creating the look of living organic tissue.
04. Advanced blending
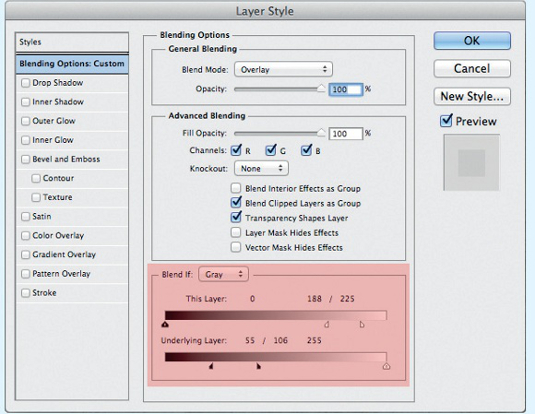
Hidden away in the Layer Style dialog, under Blending Options, are the incredibly useful Blend If sliders. You'll find them under the Advanced Blending header.
You use these to blend the layer according to either its own grey or RGB values, or the values of the layer beneath it, or both. They enable you to define value ranges that become transparent.
The sliders are particularly useful for dropping a photographic texture onto the one beneath it, such as a photo of some rust onto an underlying metal layer. Holding down [Alt] while adjusting a point on the slider splits it to allow a finer transition.
The dialog also offers a number of other options for expanding and fine-tuning layer blending.
05. Adjustment layers
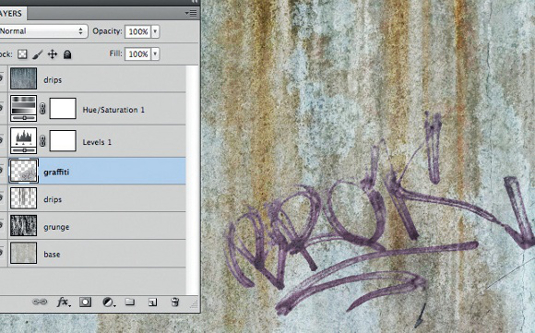
Adjustment layers have long been one of Photoshop's greatest features, allowing you to alter the values of colours or tones of the layers beneath them without permanently applying the change to them.
Levels, Hue/Saturation and Color Balance are all of particular use to the texture painter, and when used in combination with the Blend If sliders (see tip 4), they're a powerful way to selectively alter tones and colours without having to use layer masks.
For example, you can use the Blend If sliders to make the adjustment layer affect only the light pixels, or just the dark ones, or any of the red, green or blue tones of the underlying layers.
06. Layer clipping
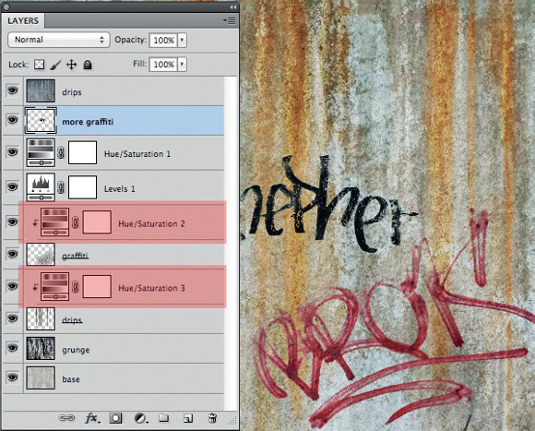
Another somewhat hidden feature of layer usage is the ability to clip layers to others. Clipping an adjustment layer to another layer will have the adjustment affect only that single layer, while clipping a regular layer to another will have the original layer's visibility controlled by the layer to which it is clipped.
In other words, the visibility of the clipped layer will depend upon the opacity of the pixels of the layer to which it is clipped. To clip a layer to another, simply position one above the other, hold down [Alt], position your cursor between the two layers in the Layers panel to get the clip option, then click.
07. Layer masks

Masks are a great way to control the visibility of any layer. Due to their nature they are totally non-destructive, as you can use them to simply 'hide' portions of a layer instead of permanently erasing those pixels.
They're especially useful in texturing when combined with grunge maps, which are essentially high-contrast images created from detailed photos. This allows you to blend layers together using highly detailed, organic masks that retain natural-looking shapes in their details.
Right-clicking a mask also allows you to open the Refine Mask dialog, which has numerous options for further refining the results. These are also all non-destructive, because the pixels of the mask aren't permanently altered by adjusting them.
08. Masked adjustments for removing lighting
Using layer masks in conjunction with adjustment layers provides a highly flexible and effective way of painting light out of photos and evening their tones, especially when using them to mask Levels and Hue/Saturation layers.
Again, this is a non-destructive technique, which allows for constant refinement or alteration at a later stage, and because you're not painting onto the actual pixels of the layer that's having its lighting removed, you end up with a cleaner, more controlled result.
We use this technique a lot when dealing with reference photos of actors, or set pieces that need to be projected onto their equivalent digital doubles in film work.
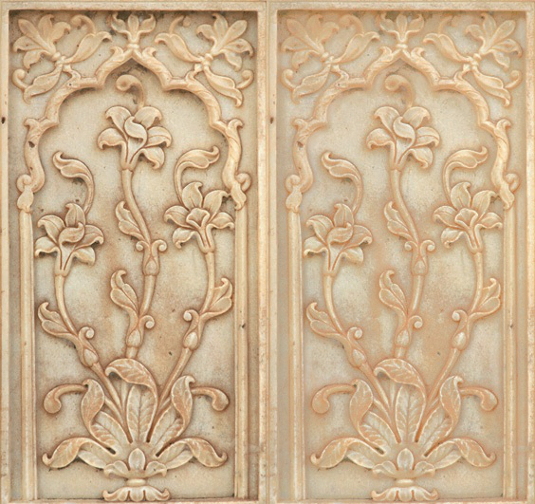
09. The High Pass filter
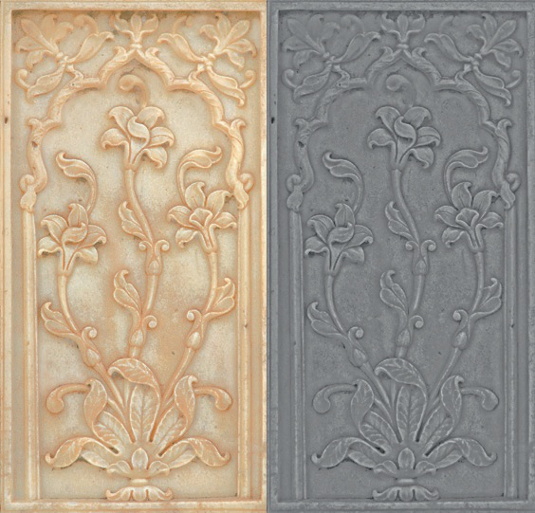
The High Pass filter, found under Filter > Other, is useful for two things in texturing: sharpening photo textures that are a little soft or need more detail enhancement, and for creating quick bump maps.
For the former, simply duplicate the layer, desaturate it, and apply the High Pass filter with a relatively low radius (below 5 pixels), and then blend it using Overlay above the original layer.
For bump maps, desaturating and applying High Pass at a relatively high pixel value is a quick way to get a good base image, because the filter's effect is based on an average of 50 per cent grey; this is good for bump maps because 3D renderers use 50 per cent grey as the median point for greyscale maps such as bump and specular.
10. Using opacity effectively
Perhaps one of the most crucial pieces of advice I can give about painting textures in Photoshop is to use a build-up approach – in other words, painting (whether it's actual painting on layers or on layer masks) is often best accomplished by using low-opacity brushes to build up the tones slowly, as opposed to simply slapping opaque paint details onto a layer and trying to blend them down.
Painting with a gentle approach is likely to yield the best results in most cases, especially when it comes to organic textures, but also when dealing with hard surfaces.
Leigh van der Byl is a VFX texture painter in London. Her recent credits include X-Men First Class and the upcoming sci-fi thriller Gravity. She also scours the globe shooting landscape photography in cold, bleak environments
Master Photoshop! Discover 120 top Photoshop tutorials.
Related articles
How To Create Photoshop Presets
Source: https://www.creativebloq.com/10-tips-better-photoshop-textures-3133109
Posted by: josephouldives.blogspot.com
0 Response to "How To Create Photoshop Presets"
Post a Comment