

How To Create A View In Sql Server Management Studio
Quickstart for Cloud SQL for SQL Server
This page shows you how to create and connect to a SQL Server instance and perform basic SQL operations using the Google Cloud Console and a client. The resources created in this Quickstart typically cost less than a dollar, assuming you complete the steps, including the clean up, in a timely manner.
Set up your project
Before performing the steps in this quickstart, complete the following tasks:
- Sign in to your Google Cloud account. If you're new to Google Cloud, create an account to evaluate how our products perform in real-world scenarios. New customers also get $300 in free credits to run, test, and deploy workloads.
-
In the Google Cloud Console, on the project selector page, select or create a Google Cloud project.
Go to project selector
-
Make sure that billing is enabled for your Cloud project. Learn how to confirm that billing is enabled for your project.
-
In the Google Cloud Console, on the project selector page, select or create a Google Cloud project.
Go to project selector
-
Make sure that billing is enabled for your Cloud project. Learn how to confirm that billing is enabled for your project.
- Make sure you have the Cloud SQL Admin role on your user account.
- Go to the IAM page. Go to the IAM page
- Click Add.
- In New Principles, add your user account name.
- In Select a role, filter for Cloud SQL Admin and select it from the list.
- Click Save.
- Enable the Cloud SQL Admin API.
Enable the API
Create a Cloud SQL instance
In this procedure, you use the Google Cloud Console. To use the gcloud command-line tool, cURL, or PowerShell, see Creating instances.
-
In the Google Cloud Console, go to the Cloud SQL Instances page.
Go to Cloud SQL Instances
- Click Create Instance.
- Click SQL Server.
- If you're prompted to enable the Compute API, click the Enable API button.
- Enter
myinstancefor Instance ID. - Enter a password for the sqlserver user.
- Use the default values for the other fields.
-
Click Create.
You are returned to the instances list; you can click into the new instance right away to see the details, but it won't be available until it initializes and starts.
Note: In this example, the instance is created using default settings, including a public IP address.
Connect to your instance using SQL Server Management Studio
Note: SQL Server Management Studio (SSMS) is a Windows-based, integrated environment. Review the SSMS documentation as needed, including for Connecting to a SQL Server instance. Alternatively, you can use other database administration tools.
- Install the Cloud SDK. The Cloud SDK provides the
gcloudtool to interact with Cloud SQL and other Google Cloud services. Thegcloudtool uses the Admin API to access Cloud SQL, so you must Enable the Admin API before using thegcloudtool to access Cloud SQL. - In a bash shell command prompt or in Windows PowerShell, run the following command to initialize the
gcloudtool:gcloud init
- Run the following command to authenticate the
gcloudtool:gcloud auth login
- Download and install the Cloud SQL Auth proxy (see Installing the Cloud SQL Auth proxy). Note the location of the Cloud SQL Auth proxy because you will run the Cloud SQL Auth proxy in next step.
- Run the Cloud SQL Auth proxy using a bash shell command prompt (or using Windows PowerShell). Specifically, run the following command, replacing
Instance-connection-namewith the corresponding value from the Google Cloud Console's Overview tab (for your instance):./cloud_sql_proxy -instances=[Instance-connection-name]=tcp:1433
For more information about installing and using the Cloud SQL Auth proxy, see About the Cloud SQL Auth proxy.
As described in the next section, now you can connect to your SQL Server instance using SSMS and the localhost IP address.
Connect using the SSMS Object Explorer
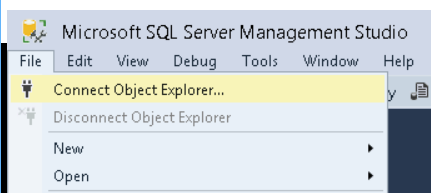
-
In SSMS, select Connect Object Explorer from the File menu.
 {: class="screenshot"}
 -
Enter the following values in the Connection dialog:
- For Server Type, enter Database Engine.
- For Server Name, enter 127.0.0.1 as the IP address of your SQL Server instance.
- For Authentication, enter SQL Server Authentication.
- For Login, enter sqlserver.
- For Password, enter the password used when the instance was created.
- Click the Connect button
Create a database and upload data
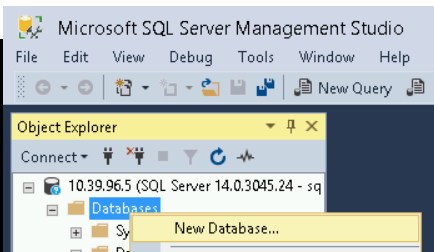
-
In the SSMS Object Explorer window, right-click the Databases node under your instance and select New Database.
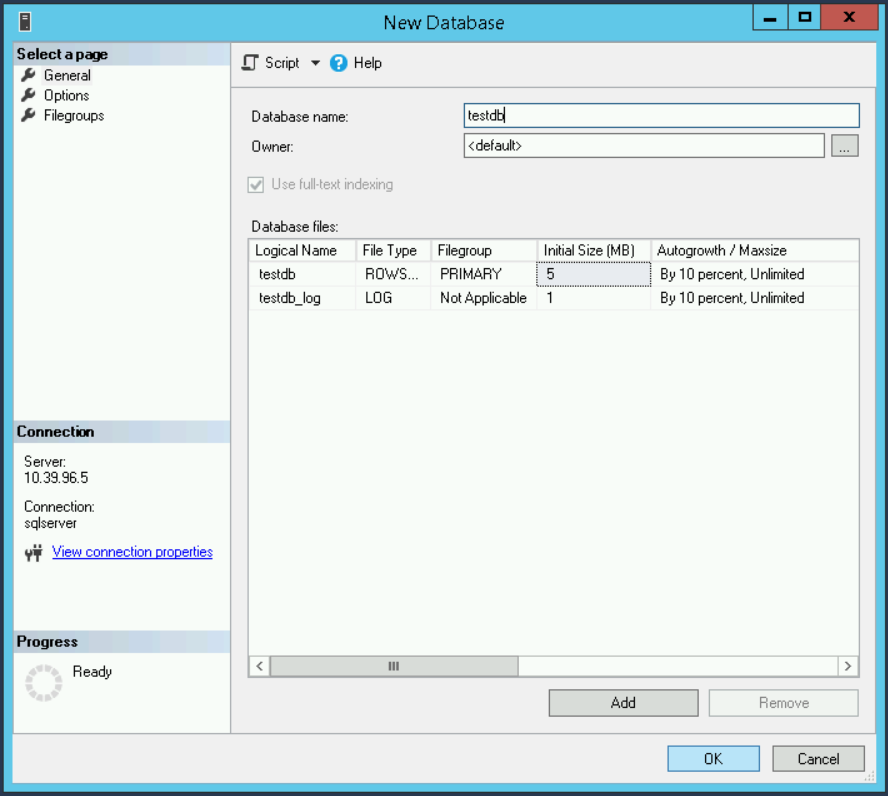
-
Enter testdb for the Database name and click the OK button.
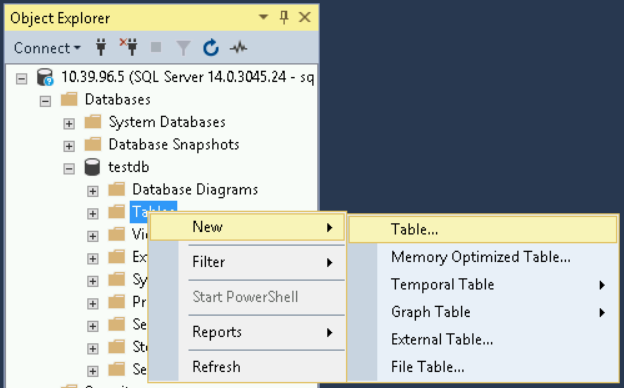
-
Under the newly created testdb database, right-click the Tables node and select New > Table.
-
Enter the following values in the Create table dialog:
- In the Properties window, for Identity > Name, enter guestbook.
- For the first Column Name, enter entryID, set its Data Type to int, and clear the Allow Nulls checkbox.
- In the Column Properties window, expand the Identity Specification item and set (Is Identity) to Yes.
- For the second Column Name, enter guestname and set its Data Type to varchar(255).
- For the third Column Name, enter content and set its Data Type to varchar(255).

-
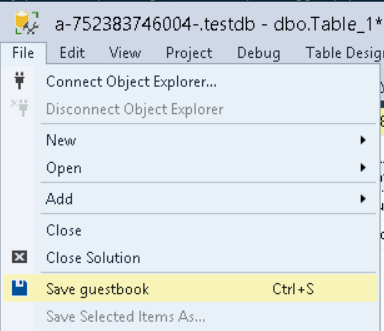
Click the File menu and select Save guestbook.
-
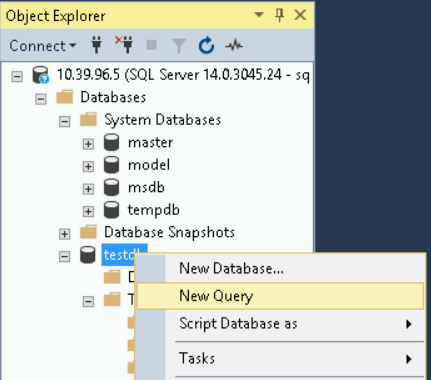
Right-click the testdb table under Databases and select New Query.
-
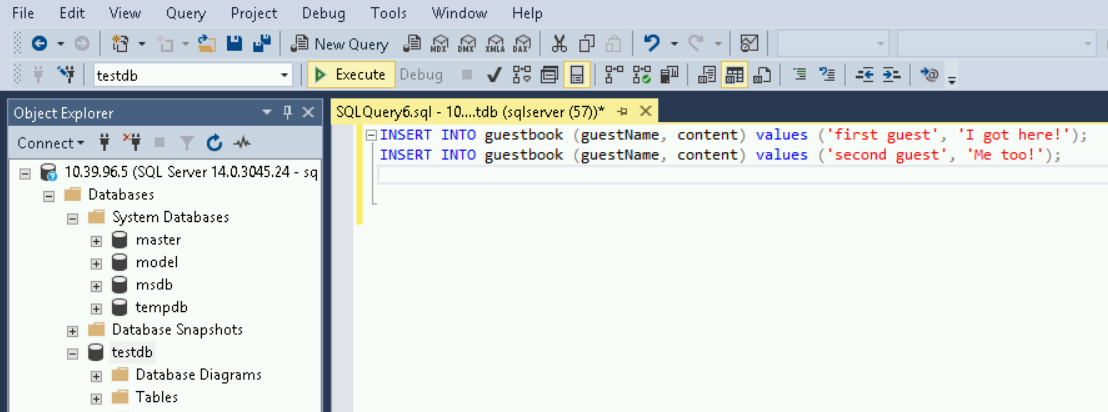
Enter the following two INSERT statements into the SQL query text window and click the Execute button.
INSERT INTO guestbook (guestName, content) values ('first guest', 'I got here!'); INSERT INTO guestbook (guestName, content) values ('second guest', 'Me too!');As an example:
-
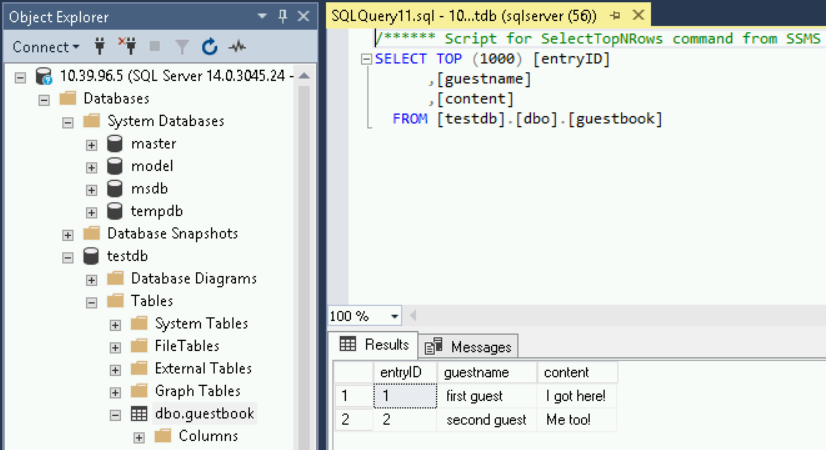
Expand the Tables item under the Databases > testdb item in the Object Explorer window. Right-click the dbo.guestbook table and choose Select Top 1000 Rows.
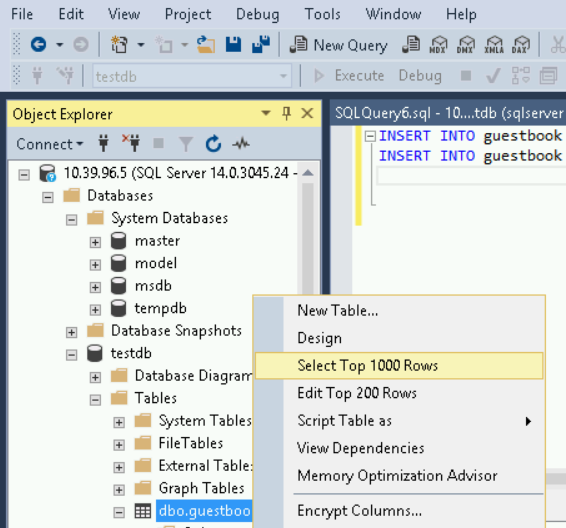
The two records you inserted are displayed as Results, along with the SQL SELECT statement used to query the records.
Cleanup
-
In the Google Cloud Console, go to the Cloud SQL Instances page.
Go to Cloud SQL Instances
- Select the your instance's name to open the Overview page.
- In the icon bar at the top of the page, click Delete.
-
In the Delete instance window, type your instance's name, then click Delete to delete the instance.
You cannot reuse an instance name for about 7 days after the instance is deleted.
What's next
Based on your needs, you can learn more about creating Cloud SQL instances.
You also can learn about creating SQL Server users and databases for your Cloud SQL instance.
Also see the Cloud SQL pricing information.
In this quickstart you connected to the instance using Cloud Shell. In most use cases, how you connect depends on your networking configuration, such as:
- If your Cloud SQL instance has a public or private IP address.
- If you're connecting from inside Google Cloud (from the same project or from a different project).
- If you're connecting from outside of Google Cloud.
Learn more about:
- All of the connectivity options in Cloud SQL.
- Configuring your Cloud SQL instance with a public IP address.
- Configuring your Cloud SQL instance with a private IP address.
Additionally, you can learn about connecting to a Cloud SQL instance from other Google Cloud applications:
- From an application running on App Engine standard environment
- From an application running on GKE
- From Cloud Functions
- From Cloud Run
Except as otherwise noted, the content of this page is licensed under the Creative Commons Attribution 4.0 License, and code samples are licensed under the Apache 2.0 License. For details, see the Google Developers Site Policies. Java is a registered trademark of Oracle and/or its affiliates.
Last updated 2021-11-19 UTC.
How To Create A View In Sql Server Management Studio
Source: https://cloud.google.com/sql/docs/sqlserver/quickstart
Posted by: josephouldives.blogspot.com
0 Response to "How To Create A View In Sql Server Management Studio"
Post a Comment